
A nonworking horn on your Hyundai Xcent can make everyday driving stressful, particularly when you need to alert another driver or warn a pedestrian. The fault may be as simple as a blown fuse or a loose electrical connection, but a damaged horn unit or a problem inside the steering column can produce the same symptom.
Understanding how the horn circuit works will help you identify the likely cause, carry out a few safe checks at home and determine when professional repairs are necessary.
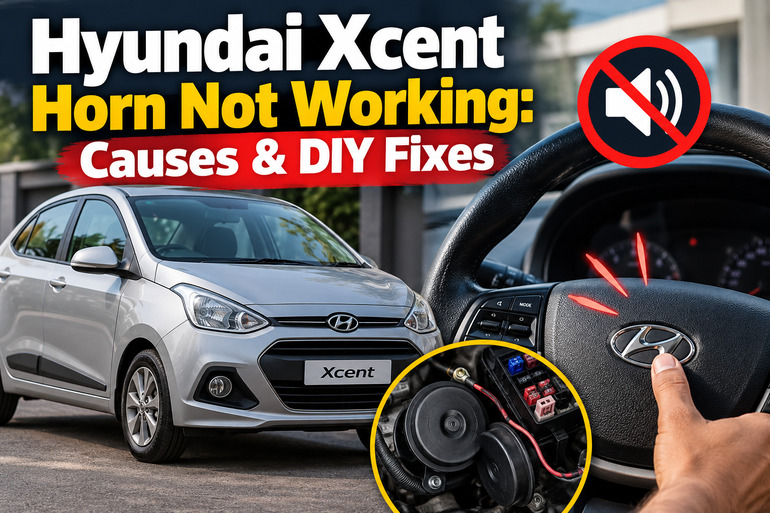
Why Your Hyundai Xcent Horn Stops Working
The horn system in your Hyundai Xcent relies on several electrical components working together. When you press the horn symbol on the steering wheel, a switch completes the control circuit, allowing electrical current to activate the horn. Depending on the vehicle’s electrical configuration, a relay helps control the current supplied to the horn unit.
A fault in any part of this circuit can prevent the horn from sounding. The horn might stop working suddenly, produce a weak or unusual sound, or operate intermittently when you press the steering wheel.
The symptoms provide useful diagnostic clues. A completely silent horn may indicate a blown fuse, faulty relay, failed horn unit or broken electrical connection. A horn that works occasionally may point to an intermittent connection or a worn steering wheel switch circuit.
Before replacing any components, establish whether the horn has stopped working completely or whether its operation changes under particular conditions. Your Xcent’s model year and variant also matter because electrical layouts can differ. The official Hyundai Xcent owner’s manual provides instructions for operating the horn and identifying the correct fuse locations for applicable versions.
Hyundai Xcent Horn Not Working: Likely Causes
Several electrical faults can cause your Hyundai Xcent’s horn to stop working. The following are the main components to consider, starting with problems that can be checked relatively easily.
1. A Blown Horn Fuse
A fuse protects an electrical circuit against excessive current. If the horn circuit draws more current than the fuse can safely handle, the fuse element melts and interrupts the electrical supply. This prevents further current from passing through the circuit.
A blown fuse can explain why your horn stopped working suddenly, even if it worked normally earlier that day. A short circuit, damaged wiring or an electrical component drawing excessive current can cause the fuse to blow.
The Hyundai Xcent owner’s manual identifies a 10A HORN fuse in the engine compartment fuse panel for the applicable versions covered by the manual. The fuse protects the horn relay circuit, including the burglar alarm horn relay. However, you should always confirm the rating and location using the label on your particular vehicle.
A fuse that has blown once may be replaceable without further repairs, but a replacement that blows again indicates an underlying electrical fault.
2. A Faulty Horn Relay
The horn relay is an electrically controlled switch that allows a relatively small control current to operate the horn circuit. When you press the steering wheel horn button, the relay should respond and allow the appropriate electrical supply to reach the horn.
A relay can fail because of worn internal contacts, electrical damage or deterioration over time. Its contacts might become unable to carry current, even when the control circuit is functioning correctly.
One possible clue is a clicking sound from the relay area when you press the horn button. A click suggests that the relay mechanism may be responding, but it does not prove that its contacts are delivering power correctly. The absence of a click can also result from a fault elsewhere in the control circuit.
Because a relay fault can resemble a blown fuse or defective horn unit, testing is preferable to replacing parts based on symptoms alone.
3. A Defective Horn Unit
The horn unit itself can fail. It contains electrical and mechanical components that produce sound when current passes through it. Wear, internal damage, moisture and corrosion can interfere with its operation.
Your Xcent’s horn may become progressively weaker, sound rough or stop working altogether. However, a sudden failure is also possible.
The horn’s position can expose it to rainwater, road dirt and moisture, particularly during wet weather or after driving through deep water. Corrosion at its terminals can prevent proper electrical contact even if the horn mechanism remains functional.
If the fuse and relay are working correctly, the horn unit becomes a stronger suspect. A technician can measure the voltage reaching the horn and test the unit independently to distinguish a defective horn from an upstream electrical problem.
4. Damaged Wiring, Loose Connectors or Poor Grounding
The horn circuit depends on secure electrical connections between its components. Loose plugs, corroded terminals, damaged insulation and broken wires can interrupt the flow of current.
These faults may develop after moisture exposure, front-end repairs, an accessory installation or physical damage around the front of the vehicle. A poor grounding connection can also prevent the horn from operating correctly even when power reaches its positive terminal.
Intermittent operation is a useful clue. If the horn sometimes works and sometimes does not, an unstable connection may be responsible. However, intermittent faults can also originate in the steering wheel switch or relay.
Visible wiring damage or corrosion around accessible connectors warrants attention, but avoid probing exposed electrical connections or disconnecting wiring without knowing the circuit layout. Damaged wiring may require electrical testing and repair by a qualified technician.
5. A Faulty Steering Wheel Horn Switch or Clock Spring
The horn button on your steering wheel activates the horn circuit. If the switch becomes worn or its internal contacts fail, pressing the horn may no longer complete the required circuit.
Another component to consider is the clock spring, a flexible electrical connection inside the steering column that maintains contact with steering wheel circuits as the wheel turns. Depending on the vehicle’s configuration, it may carry connections for the horn, airbag and steering wheel controls.
A damaged clock spring can interrupt the horn signal. Other clues may include steering wheel audio controls that stop working or an illuminated airbag warning light, although these symptoms do not establish the diagnosis on their own.
This repair requires professional attention because the steering column contains airbag components. Do not remove the steering wheel or dismantle the airbag assembly as a DIY troubleshooting step.
Hyundai Xcent Horn Not Working: DIY Fixes
You can begin with a few straightforward checks before paying for replacement parts. Work through the following methods in order, stopping if you encounter damaged wiring, recurring fuse failures or symptoms involving the airbag system.
1. Confirm That You Are Pressing the Correct Horn Area
Start with the simplest check. Hyundai’s owner’s manual instructs drivers to press the marked horn symbol on the steering wheel. Pressing a different section of the steering wheel may not activate the horn because the switch operates only in the designated area.
Park the vehicle safely, apply the parking brake and press the marked area firmly without striking it. Test it a couple of times rather than repeatedly pressing it with excessive force.
If the horn remains silent, continue to the fuse and electrical checks. Do not hit the steering wheel or use a sharp object to force the horn to operate, as Hyundai specifically warns against this practice.
2. Inspect the Horn Fuse
A visual inspection of the horn fuse is one of the easiest checks you can perform without dismantling the car.
First, switch off the ignition and all electrical accessories. Open the engine compartment and locate the fuse box using your owner’s manual. The manual’s applicable fuse diagram identifies the horn fuse in the engine compartment panel.
The printed label on your fuse box is particularly important because the arrangement may vary by model year or variant. For applicable versions covered by the manual, the horn fuse is rated at 10A.
Use the fuse puller provided in the fuse panel, if available, to remove the suspected fuse. Examine the metal element inside its transparent housing. If the element is visibly broken or melted, the fuse has blown. A fuse can occasionally fail without an obvious visual sign, so a suitable fuse tester can provide a more reliable check.
If the fuse is blown, replace it with a new fuse of exactly the same rating. Never substitute a higher rated fuse, bridge the fuse terminals or use makeshift conductive materials. These practices can damage wiring and create a fire risk.
After fitting the replacement, secure the fuse box cover properly and test the horn. If the replacement fuse blows again, stop replacing fuses and have the circuit inspected for a short circuit or excessive current draw.
3. Check the Horn Relay
If the fuse is intact but the horn remains silent, inspect the relay identified by the fuse box diagram.
With the ignition switched off, locate the horn relay according to the label on your vehicle. Look for obvious signs of damage around the accessible fuse and relay panel, such as discoloration or evidence of moisture. Do not remove electrical components while the circuit is powered.
A relay that clicks when you press the horn button may be responding, but the click alone cannot confirm that it is functioning correctly. A silent relay also does not prove that the relay itself is defective because a faulty switch or broken connection may prevent it from receiving its control signal.
Replacing the relay may be reasonable if testing identifies it as faulty. If your owner’s manual or relay markings confirm that another relay is identical in part number, pin layout and electrical rating, a suitable substitution may help with diagnosis. Never swap relays based on appearance alone.
Where the relay layout is unclear or testing requires electrical measurements, ask an automotive electrician to test it. This avoids unnecessary replacement and reduces the risk of damaging the fuse panel.
4. Inspect Accessible Wiring and Connections
Loose or corroded connections can prevent a functioning horn from receiving the electrical supply it needs. If the horn stopped working after heavy rain, a car wash or repairs to the front of the vehicle, moisture or disturbed wiring deserves consideration.
With the vehicle switched off, visually inspect accessible wiring around the front of the engine compartment for obvious damage, disconnected plugs or corrosion. Avoid reaching behind hot components or touching exposed wires. Do not remove the steering wheel, airbag components or inaccessible electrical connectors.
If you discover a loose connector that can be safely identified and accessed without dismantling anything, consult the owner’s manual or a qualified technician before attempting to reconnect it. Damaged insulation, melted connectors and corroded terminals need proper repairs rather than temporary twisting or taping of exposed conductors.
When no obvious problem is visible, an automotive electrician can test the power supply, grounding and wiring continuity. These measurements help establish whether current is reaching the horn correctly.
5. Have the Horn Unit Tested
If the fuse is intact and the control circuit appears to be working, the horn itself may be defective.
The next diagnostic step is to check whether the correct voltage reaches the horn when the steering wheel button is pressed. If the supply and ground are satisfactory but the horn produces no sound, the unit may need replacement. If the required electrical supply is missing, the problem is more likely to be in the relay, wiring or control circuit.
Testing the horn directly with a battery or improvised jumper wires is best left to someone familiar with automotive electrical systems. An accidental short circuit can damage wiring, blow fuses or cause burns.
A qualified technician can test the horn independently, inspect its mounting and connectors, and determine whether cleaning, connection repairs or replacement is appropriate. Replacing the horn unit before verifying the supply and ground may leave the original fault unresolved.
Final Solution: Contact a Qualified Automotive Electrician
Professional diagnosis is necessary if the basic checks do not restore your Hyundai Xcent’s horn. It is also the appropriate next step if the fuse keeps blowing, the horn operates intermittently, wiring appears damaged or the steering wheel controls develop problems.
Choose a qualified automotive electrician or Hyundai service centre that can test the circuit using the correct wiring diagram and electrical equipment. Tell the technician when the fault began, whether the horn stopped suddenly, and whether it clicks, sounds weak or works intermittently. This information can help narrow down the fault.
If an airbag warning light appears alongside horn failure, arrange prompt professional inspection and avoid dismantling the steering column. Since the horn is an important safety device, repair the fault before returning to normal driving.
Wrap-Up
A Hyundai Xcent horn that stops working may have a blown fuse, a faulty relay, a defective horn unit, damaged wiring or a problem with the steering wheel switch circuit. The symptoms can help narrow the possibilities, but testing is the best way to confirm the cause.
Begin by checking the correct fuse and inspecting accessible components safely. Use the fuse rating specified for your vehicle and never bypass electrical protection. If simple checks fail or the problem returns, have the circuit professionally diagnosed. Restoring the horn promptly helps you communicate with other road users and maintain safer driving conditions.