
When your Hyundai i10’s brake lights stop working, drivers behind you may not realize you’re slowing down or stopping. The problem can arise from something as simple as a failed bulb or a blown fuse, but a faulty brake pedal switch or damaged wiring can produce similar symptoms.
You can begin diagnosis with a few safe checks before paying for repairs. The key is to identify whether one brake light has failed, all the lights are out, or the lights remain illuminated after you release the pedal.
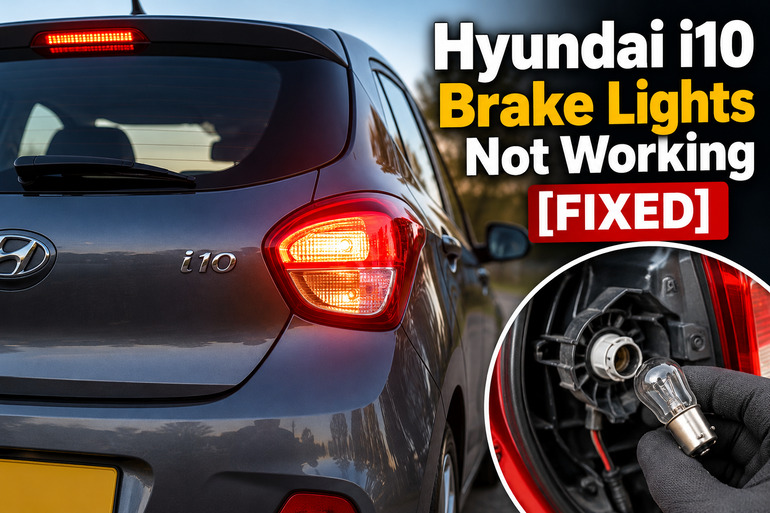
What It Means When Your Hyundai i10 Brake Lights Stop Working
Your Hyundai i10’s brake lights illuminate when you press the brake pedal. A switch near the pedal detects the movement and signals the lighting circuit to turn on the rear stop lamps. Depending on the model and equipment, the system may also use electronic control modules to manage the signals.
Most versions have brake lights integrated into the rear lamp assemblies, along with a high mounted stop light near the rear window or another elevated position. Some use replaceable bulbs, while others use LED assemblies. The exact arrangement depends on the model year and trim level.
The symptoms can help narrow down the fault. If only one rear brake light fails, its bulb, socket, or local wiring deserves attention first. If both rear brake lights and the high mounted stop light fail together, a shared electrical component, such as a fuse, brake pedal switch, or power supply, becomes a stronger possibility.
You may also notice that the brake lights work intermittently, flicker when you press the pedal, or remain on after you release it. These symptoms can indicate a poor electrical connection, an incorrectly adjusted switch, or a switch that has failed internally. Brake lights that remain illuminated can also drain the battery while the car is parked.
Because functioning brake lights are essential for road safety, avoid driving the vehicle in traffic until the problem has been corrected. If you cannot repair the fault safely where the car is parked, arrange suitable roadside assistance or vehicle recovery.
Hyundai i10 Brake Lights Not Working [FIXED]: Likely Causes
Several faults can prevent your Hyundai i10’s brake lights from working correctly. The pattern of failure, together with a few basic observations, can help you distinguish a failed bulb from a problem affecting the entire lighting circuit.
1. A Burnt Out Brake Light Bulb
A failed bulb is one of the first things to investigate when a single brake light stops working. The filament inside a conventional bulb can break after prolonged use or repeated exposure to vibration and heat.
Some Hyundai i10 versions use dual-filament bulbs, allowing one bulb to provide the ordinary tail light and the brighter brake light. In these designs, the tail light can continue to work even when the brake light filament has failed. Consequently, seeing a red light illuminate at night does not prove that the brake light function is working correctly.
LED lamps have different failure patterns. An individual LED can fail, or an internal electrical component can stop the assembly from illuminating. If the affected light uses an integrated LED unit, replacing a conventional bulb may not be possible.
How to recognize it: If one brake light is out while the other rear brake light and the high mounted stop light operate normally, a failed bulb or local lamp connection is a reasonable starting point.
2. A Blown Brake Light Fuse
A fuse protects an electrical circuit from excessive current. If a short circuit or another electrical fault causes the current to exceed the fuse’s rating, the fuse may blow to protect the wiring.
Depending on the Hyundai i10 model, the interior fuse panel may contain a fuse labelled STOP LAMP, BRAKE SWITCH, or both. These labels can refer to different parts of the braking and lighting circuits. For example, some Grand i10 Nios versions have a 10 amp brake switch fuse and a separate 15 amp stop lamp fuse. These ratings should not be assumed to apply to every i10.
A blown fuse may cause all the brake lights to stop working, although the exact effect depends on which circuit has lost power. Other symptoms may include problems with related functions that share the circuit.
A replacement fuse that blows again immediately or shortly after installation suggests that an underlying electrical fault remains. Replacing fuses repeatedly will not correct a short circuit.
3. A Faulty Brake Pedal Switch
The brake pedal switch detects when you press or release the pedal. It is usually fitted near the upper part of the pedal mechanism, beneath the dashboard.
When you press the pedal, the switch changes its electrical state and allows the brake light system to respond. If the switch wears out, develops an internal fault, or moves out of its correct position, it may fail to send the proper signal.
A faulty switch can explain why all brake lights stop working at once. It can also produce the opposite symptom, where the brake lights remain on even after the pedal has returned to its normal position.
Some versions of the i10 use the brake switch signal for other vehicle functions. Depending on the configuration, a switch fault may also affect certain starting, gear selection, or driver assistance functions. These additional symptoms can support the diagnosis, but they do not prove that the switch is defective.
4. Damaged Bulb Sockets, Connectors, or Ground Connections
Electricity must travel through the wiring and lamp connections before the brake lights can illuminate. If a socket becomes corroded, a connector loosens, or a ground connection develops excessive resistance, the affected light may become dim, flicker, or stop working.
Moisture entering a rear lamp assembly can contribute to corrosion. You may see greenish deposits on metal contacts, rust, water droplets inside the housing, or darkened areas around a bulb socket.
A poor ground connection can produce unusual lighting behavior, especially when several functions share the same rear lamp assembly. For example, the brake light may glow weakly or behave differently when the tail lights or turn signals are switched on.
If only one side is affected, examine that lamp’s accessible connections first. When several lights are affected, a shared connection or power supply may be responsible, although individual faults can occur at the same time.
5. Damaged Wiring or an Electrical Control Fault
Brake light wiring can become damaged through abrasion, corrosion, previous repairs, or a connector that has not been secured correctly. The problem may occur near the rear lamp assembly, within a wiring harness, or around a connector exposed to moisture.
A broken wire can interrupt the electrical path. A short circuit can cause a fuse to blow, while a poor connection may cause the lights to operate only intermittently. If the fault appears after rear end damage, lamp replacement, or other electrical work, the disturbed components deserve particular attention.
On versions equipped with electronic body control modules, a fault in the control circuit or its inputs may also prevent the brake lamps from operating. However, a control module should not be replaced simply because the lights are out. A technician should first test the fuse, switch, wiring, power supply, and relevant fault codes to identify the actual cause.
Hyundai i10 Brake Lights Not Working [FIXED]: How to Fix
Start by observing exactly which lights have failed. Once you understand the pattern, work through the following checks in order, beginning with simple inspections before attempting any electrical replacement.
1. Test All Brake Lights
Begin with a basic functional test. Park your Hyundai i10 on level ground, engage the parking brake, switch off the engine, and ask someone to observe the rear lights while you press and release the brake pedal.
If another person is unavailable, position the car where you can safely observe the lamps through their reflections in a window or another suitable reflective surface. Avoid relying on a reflection that makes it difficult to distinguish the brake lights from the ordinary tail lights.
Check the left brake light, right brake light, and high mounted stop light. Record which ones illuminate and whether they switch off when you release the pedal.
Use these observations to guide your next step.
-
One light is out: Investigate the bulb, LED assembly, socket, and wiring on that side.
-
All brake lights are out: Check the brake switch fuse, stop lamp fuse, pedal switch, and shared electrical supply.
-
The brake lights stay on: Investigate the pedal return mechanism, switch position, and switch operation.
-
The lights flicker: Look for an intermittent connection or wiring fault.
This test does not confirm the cause, but it helps you avoid replacing parts without evidence.
2. Inspect and Replace a Failed Bulb
If one brake light has failed, consult your owner’s manual to determine how to access the rear lamp assembly. Depending on the i10 version, access may be available from inside the luggage compartment or through another model specific arrangement.
Switch off the ignition and exterior lights before working on the lamp. Allow any recently illuminated bulb to cool. Open the appropriate access panel and remove the lamp or bulb holder according to the manufacturer’s instructions.
Inspect a removable bulb for a broken filament, blackened glass, or damaged contacts. A filament can fail without obvious external signs, so a visual inspection alone cannot always confirm that a bulb is defective.
If the bulb is faulty, install a replacement with the correct type and specification for your vehicle. Some bulbs combine tail light and brake light functions, so selecting a bulb based solely on its shape can lead to an incorrect fit or lighting performance.
For a halogen bulb with quartz glass, avoid touching the glass with bare fingers. Refit the holder securely and reassemble the lamp before testing the lights again.
If the failed component is an integrated LED unit, do not assume that the LEDs can be replaced individually. Follow the owner’s manual or have the lamp assembly inspected by a qualified technician.
3. Check the Brake Light Fuses
If all the brake lights are out, or if replacing a bulb has not solved the problem, inspect the relevant fuses.
Locate the fuse panel using your owner’s manual. The fuse panel cover normally contains a diagram identifying the circuit names and ratings. Look for labels such as STOP LAMP and BRAKE SWITCH, but check the diagram for your exact vehicle rather than relying on a fuse chart for another model year.
With the ignition off, remove the relevant fuse only if the manual permits you to do so safely. Inspect the fuse element for a break, or use an appropriate fuse tester if you know how to use one.
If the fuse has blown, replace it with a fuse of exactly the specified rating. Never install a fuse with a higher rating, bridge the terminals, or substitute wire or metal. Doing so can allow excessive current to damage the wiring or cause a fire.
Test the brake lights after replacing the fuse. If it blows again, stop replacing it and arrange an electrical inspection. A continuing short circuit must be located and repaired before the circuit can operate reliably.
4. Inspect the Brake Pedal and Switch Area
A brake pedal switch problem can affect every brake light, so check for obvious mechanical interference around the pedal.
With the vehicle parked securely and the ignition off, use a flashlight to inspect the area above the brake pedal. Look for loose trim, trapped objects, damaged brackets, or anything that might prevent the pedal from returning fully after you release it.
Press and release the brake pedal gently. It should return to its normal resting position without being obstructed. Do not place your fingers near moving pedal components while operating the pedal, and do not crawl beneath an unsupported vehicle.
A switch that has become loose or misaligned may need adjustment or replacement. However, its correct position can be important for brake light operation and other vehicle systems. Avoid removing the switch, changing its adjustment, or disconnecting its wiring unless the repair procedure for your specific i10 provides clear instructions.
If the brake lights remain on or stay off despite the pedal returning normally, have the switch tested. A technician can verify the electrical signal and determine whether the switch, its connector, or a related circuit is faulty.
5. Examine the Rear Lamp Connections and Visible Wiring
If a bulb and fuse appear serviceable, inspect the accessible rear lamp connections. Look for a loose plug, signs of moisture, visibly corroded contacts, a damaged socket, or wiring that has been pinched or cut.
Switch the ignition and lights off before inspecting connectors. Do not pull on the wires themselves, insert metal objects into electrical terminals, or disconnect unfamiliar modules. If you see melted plastic, exposed conductors, or significant corrosion, avoid using the circuit until it has been repaired.
A connector that has simply come loose may explain a light that stopped working after luggage was moved, the rear lamp was serviced, or the vehicle underwent bodywork. Reconnecting an accessible plug may restore operation, provided there is no damage and the manual permits the task.
More complicated faults require electrical testing. A technician may need to measure voltage at the brake switch and lamp connector, perform continuity tests on the wiring, check ground connections, and scan the control system where applicable. These tests help distinguish a broken wire from a failed switch or electronic control fault.
6. Contact a Qualified Automotive Technician
Professional diagnosis is necessary when the basic checks do not reveal the cause, a replacement fuse blows again, or the brake lights continue to behave unpredictably.
A qualified Hyundai technician or automotive electrician can test the brake pedal switch, confirm power and ground at the rear lamps, inspect the wiring harness, and check relevant control module fault codes. This avoids replacing expensive parts based on guesswork.
Seek assistance promptly if the lights stay illuminated, several electrical functions fail together, or you notice burning smells, melted connectors, or damaged wiring. These symptoms may indicate a fault that needs attention beyond the lamp itself.
Do not drive the vehicle normally while its brake lights are inoperative. Arrange roadside assistance or recovery when needed, and ask the technician to verify that all brake lights illuminate when the pedal is pressed and switch off correctly when it is released.
Wrap-Up
When your Hyundai i10’s brake lights stop working, the pattern of failure is a useful starting point. A single failed light points toward its bulb, lamp assembly, or local connection, while a complete loss of brake lighting calls for checks of the shared circuit, fuse, and pedal switch.
Begin with a careful lighting test, consult the correct fuse diagram, and replace only components you can identify and handle safely. If the fault persists or a replacement fuse blows again, professional electrical diagnosis is the sensible next step. Confirm that every brake light works correctly before returning the car to normal road use.