
When your Hyundai Kona refuses to charge, the problem can interrupt your daily plans and leave you wondering whether the battery or charging system has failed. Sometimes, the cause is as simple as a charging schedule, a loose connector, or a faulty charging station. Other times, the vehicle may have a problem that requires professional diagnosis.
Understanding the symptoms helps you narrow down the cause before spending money on repairs. Several checks are safe to perform at home, provided you avoid the high voltage components.
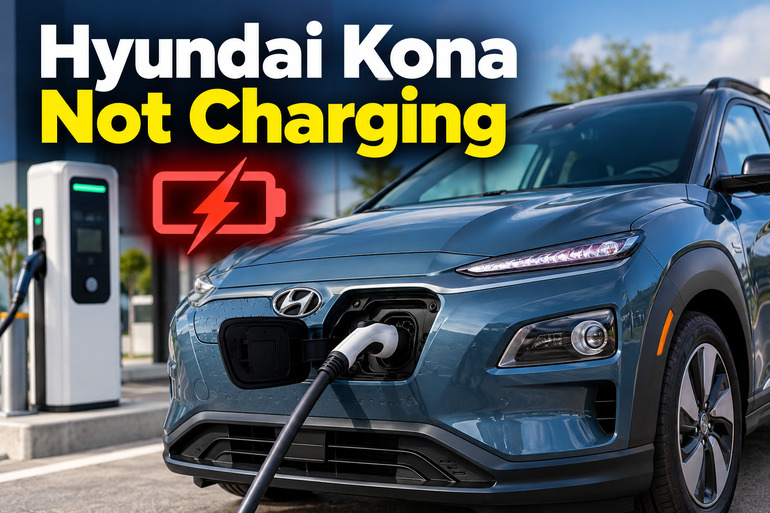
Understanding the Hyundai Kona Charging Problem
The Hyundai Kona Electric uses a high voltage battery to power its electric motor. You replenish this battery by connecting the vehicle to a compatible AC home charger, portable charger, or DC fast charger. The vehicle’s charging control system manages the process and stops charging when necessary to protect the battery and electrical components.
When the Kona fails to charge, you may notice that the battery percentage stays the same after plugging in, the charging indicator fails to illuminate, or the instrument cluster displays a warning message. Charging might also start normally before stopping unexpectedly. These symptoms can point to different faults, so the circumstances surrounding the failure are useful diagnostic clues.
The charging problem may originate from the external power supply, charging equipment, vehicle settings, charging inlet, or an internal electrical fault. Cold or excessively hot battery conditions can also affect charging speed or prevent charging temporarily.
This guide focuses primarily on the Hyundai Kona Electric and its high voltage battery charging system. If you own a gasoline powered Kona and mean that its 12 volt battery is not charging while the engine runs, the likely causes are different. That problem generally involves the alternator, battery, wiring, or related charging components.
Hyundai Kona Not Charging: Likely Causes
Several faults can prevent a Hyundai Kona Electric from accepting a charge. Before replacing expensive components, check the simpler possibilities and pay attention to any warning messages displayed by the vehicle.
1. A Faulty Charging Station or Power Supply
Your Kona depends on a compatible external electricity supply to recharge its battery. If the home charging unit has lost power, a circuit breaker has tripped, or a public charging station has developed a fault, the vehicle may not start charging.
A failed charging session does not automatically mean something is wrong with the car. Public charging stations can display an error, fail to authorize a session, or stop delivering power even when the connector is correctly attached.
Look at the charging unit’s display or status lights for error indications. If the charger has no power, check whether other electrical equipment on the same circuit works. A circuit breaker that repeatedly trips suggests an electrical problem that needs qualified attention.
2. The Charging Connector Is Not Fully Seated
The charging connector must fit securely into the vehicle’s charging inlet before charging can begin. If the connector is partially inserted, the vehicle may fail to establish the required connection with the charger.
Dirt, foreign material, visible damage, or a worn connector can also interfere with the connection. Sometimes, the connector appears to be attached but remains slightly loose, preventing the charging process from starting.
A connector that repeatedly falls out of position, feels unusually loose, or shows signs of heat damage requires further inspection. Never force the plug into the inlet or attempt to straighten damaged electrical contacts.
3. Scheduled Charging or Incorrect Charging Settings
The Kona Electric can support scheduled charging, allowing you to arrange charging for particular times. When this feature is enabled, connecting the car to a charger may not cause immediate charging because the vehicle is waiting for the programmed schedule.
The target battery charge limit can also create confusion. For example, if the car is set to stop charging at a selected percentage and the battery has already reached that level, charging may stop as intended.
Depending on the model year and equipment, the relevant settings may be available through the infotainment system or a compatible connected vehicle application. Check both the charging schedule and the maximum charge setting before assuming the battery or charger has failed.
4. Low Temperatures or Excessive Battery Heat
The high voltage battery operates within a preferred temperature range. When the battery is very cold or hot, the vehicle may reduce charging power, delay charging, or temporarily prevent the process from starting.
Cold weather can make charging noticeably slower, particularly when the battery has not warmed sufficiently. After repeated driving or fast charging in hot conditions, the vehicle may also limit charging to control battery temperature.
Temperature related charging limitations can resemble a mechanical or electrical fault. However, persistent warnings about battery temperature or the electric vehicle system should not be ignored. If the vehicle reports a temperature or power supply fault that does not clear, arrange professional diagnosis.
5. A Fault in the Charging System or High Voltage Battery
If the charging equipment works properly and the settings are correct, the problem could be inside the vehicle. Potential causes include a faulty charging inlet, an onboard AC charger fault, a high voltage battery control problem, or a failure involving the vehicle’s charging management system.
The onboard charger converts incoming AC electricity into the form required to charge the high voltage battery. DC fast charging follows a different power path, so a vehicle that charges using one method but refuses another may have a fault specific to that charging route.
For example, successful DC fast charging alongside repeated failure at AC stations can help a technician narrow the diagnosis toward the AC charging equipment or related controls. This does not prove that the onboard charger has failed, but it provides useful evidence.
High voltage battery problems and internal charging faults require suitable diagnostic equipment. Do not open the battery enclosure, remove high voltage covers, or attempt to repair internal charging components yourself.
Hyundai Kona Not Charging: DIY Fixes
Start with the checks that require little equipment and carry minimal risk. If the problem continues after you have confirmed the charger, connector, and settings are correct, avoid repeated charging attempts and arrange a proper inspection.
1. Check the Charger and Electrical Supply
Begin by confirming that the charger is receiving electricity and is ready to operate. If you’re charging at home, inspect the charger’s display or indicator lights and confirm that the unit has not reported an error.
For a portable charger, check the visible condition of the power cable and plug. Use only a suitable, correctly rated supply specified for the charging equipment. Avoid extension cords or adapters unless the charger manufacturer explicitly permits them for that application.
If a breaker has tripped, do not keep resetting it when the problem returns. A repeated trip can indicate an electrical fault. Contact a qualified electrician or charging equipment technician to inspect the circuit.
When using a public station, follow its displayed instructions and complete any required authorization or payment steps. If the charger reports a fault, end the session according to its instructions and try another compatible station if it is safe to do so.
If the Kona charges successfully at another station, the original charging equipment or its power supply is a likely source of the problem. Report the faulty unit to its operator.
2. Disconnect and Reconnect the Charging Connector
A poorly seated connector is one of the easiest possible causes to address. Before disconnecting it, stop the charging session using the vehicle or charger’s normal controls. Follow the instructions for the particular charger and charging type.
Once the session has ended, release the connector using its normal latch or release mechanism. Check the connector and vehicle inlet visually for obvious damage, moisture, or foreign material. Do not touch the electrical contacts or insert tools into the inlet.
Reconnect the plug firmly, following the connector manufacturer’s instructions. It should seat correctly without excessive force. Check the vehicle’s charging indicator, instrument cluster, and charger display to confirm that a session has started.
On applicable Kona Electric models, a green charging connector indicator confirms the connection with the vehicle, but the connection indicator alone does not establish that energy is flowing into the battery. Check the actual charging status and battery percentage as well.
If the connector remains loose or the vehicle repeatedly refuses to accept it, stop trying and arrange an inspection.
3. Review the Scheduled Charging and Battery Limit Settings
If the connector is secure but the battery percentage is not increasing, check whether the vehicle is waiting for a scheduled charging period.
Depending on your Kona’s model year and software, look for the scheduled charging controls in the infotainment system or compatible connected vehicle application. Disable or adjust the schedule temporarily so that charging can begin immediately.
Next, inspect the selected battery charge limit. If the vehicle has already reached the requested percentage, charging may stop normally. Select a suitable higher limit when additional charge is needed, provided the setting is available for your vehicle and charging type.
After adjusting the settings, reconnect the charger if the vehicle’s instructions require it. Monitor the charging status to see whether the battery percentage begins increasing.
Charging schedules and charge limits serve useful purposes, so you do not need to leave them disabled. Restore your preferred settings once the immediate problem is understood.
4. Allow the Battery to Return to a Suitable Temperature
If the problem occurs during unusually cold or hot weather, temperature may be affecting charging performance.
Park in a safe location with suitable ventilation and allow the vehicle to respond to the ambient conditions. If you have a garage, use it when appropriate, provided the space is suitable for charging and the manufacturer’s safety instructions are followed.
Where the vehicle supports battery conditioning or preconditioning, use the function according to the owner’s manual. Availability and operation vary by model year, battery configuration, and equipment. Do not improvise methods to heat or cool the battery.
Once conditions improve, try charging again while watching for warning messages. A lower initial charging rate may be normal because the vehicle is protecting the battery.
However, a persistent battery temperature warning or a message directing you to stop the vehicle requires prompt attention. Follow the displayed instructions and seek authorized Hyundai service when indicated.
5. Test With Another Compatible Charger
Testing the Kona with another known working charger can help establish whether the problem is external or vehicle related.
If the original problem occurs with a home AC charger, try another compatible AC charging point. If you encounter the problem at a public station, use another operational station that supports your vehicle’s connector and charging requirements.
Observe whether the charging session starts normally, whether the displayed charging power is reasonable for the equipment and conditions, and whether the battery percentage increases.
If another charger works, the original charging station, cable, power supply, or associated settings deserve further investigation. Contact the equipment provider or a qualified electrician as appropriate.
If the Kona refuses to charge using multiple verified compatible chargers, the fault is more likely to require vehicle diagnosis. The comparison is especially useful when you tell the technician which charging methods worked and which failed.
6. Contact a Qualified Electric Vehicle Technician
Professional diagnosis is the appropriate next step if the preceding checks do not resolve the problem. A Hyundai authorized workshop or qualified electric vehicle technician can inspect stored fault codes, charging communication, the inlet assembly, onboard charging equipment, and relevant battery management systems.
Tell the technician whether charging fails immediately, starts and stops, or works with one charging method but not another. Report the charging equipment used and any warning messages displayed. These details can help reduce unnecessary testing and component replacement.
Stop attempting to charge the car and seek qualified assistance if you notice smoke, a burning smell, unusual heat around the charging inlet, damaged charging equipment, exposed wiring, or repeated electrical faults. Do not touch damaged cables or attempt to open high voltage components. If there is smoke or a fire, move away from the vehicle and contact emergency services.
A fault in the 12 volt battery can also affect an electric Kona’s electrical systems. If the car has difficulty unlocking, powering up, or recognizing the charging connector, a technician may need to check the 12 volt battery and its connections. This does not automatically mean the high voltage battery has failed.
Wrap-Up
A Hyundai Kona that refuses to charge may have a problem with its power supply, connector, settings, battery temperature, or internal charging system. Checking these possibilities in a sensible order can help identify simple problems without risking damage to the vehicle.
Start by confirming that the charger works, the connector is seated correctly, and the charging settings allow the session to begin. Testing another compatible charger can provide further clues.
If the problem persists, warning messages appear, or you notice signs of electrical damage, stop troubleshooting and seek qualified assistance. Accurate diagnosis is the safest way to restore reliable charging and avoid unnecessary replacement costs.