
Your Kia Picanto’s indicators help other drivers understand when you’re about to turn or change lanes. When they suddenly stop working, flash too quickly, or fail on one side, even a short journey can become risky. The problem might involve something as simple as a burned bulb or a more complicated electrical fault.
Fortunately, several common causes are relatively easy to identify. Understanding the warning signs can help you find the problem and avoid unnecessary repairs.
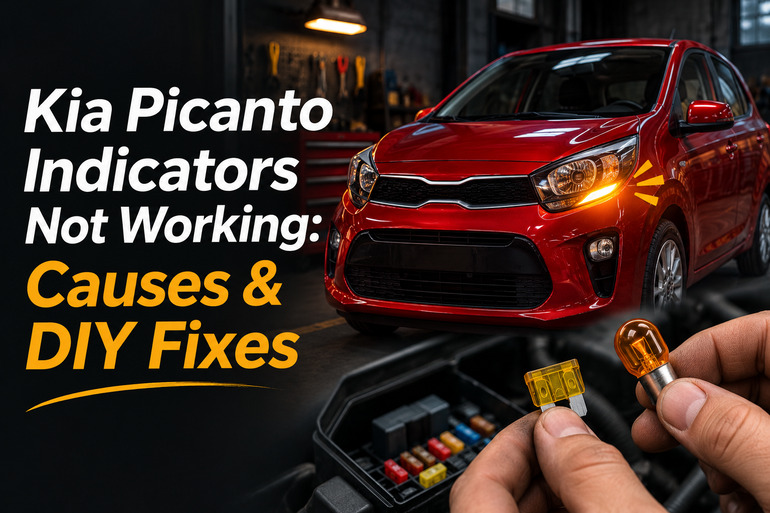
Understanding Why Your Kia Picanto Indicators Aren’t Working
The indicators on your Kia Picanto are part of its electrical lighting system. When you move the indicator stalk beside the steering wheel, the system activates the flashing lights on the corresponding side of the vehicle. Depending on the model, a flasher unit or electronic control module manages the flashing pattern. The green arrows on your dashboard also blink to show which direction you’ve selected.
When something goes wrong, the symptoms can vary. You might find that the left indicators work while the right ones remain completely off. In other cases, both sides fail, the dashboard arrows flash unusually fast, or the lights stay illuminated without blinking. Kia’s operating instructions identify abnormal flashing as a possible sign of a failed bulb or poor electrical connection.
Your Picanto’s hazard warning lights can also provide useful clues. They activate the indicators on both sides simultaneously and, on models covered by Kia’s manual, operate even when the ignition is switched off. If the hazard lights work normally but the indicators don’t respond to the stalk, the problem may involve the stalk, its electrical supply, or the control circuit. However, the hazard lights working doesn’t completely rule out an electrical fault.
Although a faulty indicator might seem like a minor inconvenience, it reduces your ability to communicate with other drivers. Furthermore, a problem that begins with occasional flashing may eventually develop into a complete failure. If your indicators aren’t working reliably, avoid unnecessary driving until the fault has been identified and corrected.
Kia Picanto Indicators Not Working: Common Causes
Several electrical and mechanical problems can stop your Kia Picanto’s indicators from operating correctly. The most likely cause depends on whether one light, one side, or the entire indicator system has stopped working.
1. Burned Out Indicator Bulbs
A burned out indicator bulb is one of the first things to suspect when only one light stops working. Like other automotive bulbs, traditional indicator bulbs contain a filament that heats up to produce light. Over time, this filament can weaken and eventually break, leaving the bulb unable to illuminate.
You may notice that the front indicator works while the rear one on the same side remains dark. Sometimes, the remaining indicators flash faster than usual because the electrical system detects a change in the circuit’s load. This unusually fast blinking is often called hyperflashing.
However, the symptoms can differ between Picanto models. Some versions have conventional bulbs, while others use LED indicator assemblies. For example, certain third generation Picanto models use PY21WLL bulbs for their conventional front and rear indicators, while some front lighting configurations use integrated LEDs. Consequently, the correct replacement depends on your vehicle’s year and lighting equipment.
2. Blown Indicator or Hazard Light Fuse
Your Kia Picanto uses fuses to protect electrical circuits against excessive current. When too much current flows through a protected circuit, the fuse’s internal metal strip melts and interrupts the supply. This helps prevent damage to the wiring and connected components.
A blown fuse may cause several indicators to stop working simultaneously, although the exact symptoms depend on your vehicle’s electrical design. Some Picanto versions have separately identified indicator and hazard circuits. If the failure appeared suddenly, particularly after electrical work or a short circuit, a damaged fuse is worth investigating.
However, a fuse normally blows for a reason. Replacing it without identifying an underlying electrical problem may result in another failure.
3. Corroded Bulb Sockets or Damaged Wiring
Your indicators rely on electrical connections between the power supply, control system, and individual lamps. If a connector becomes loose, a wire breaks, or corrosion develops inside a bulb socket, electricity may no longer reach the lamp properly.
Moisture is one possible contributor. Water entering a damaged light assembly can affect metal contacts and eventually interfere with electrical connections. You might notice greenish deposits around a connector, discoloration inside a socket, or an indicator that works occasionally before failing again.
Wiring damage can produce similar symptoms, especially if the problem began after an accident, body repair, or light assembly replacement. A damaged ground connection can also affect the return path for electrical current, sometimes causing weak, irregular, or unexpected lamp behavior. Therefore, a bulb that repeatedly stops working despite replacement deserves closer inspection.
4. Faulty Indicator Stalk or Hazard Light Switch
The indicator stalk beside your steering wheel allows you to select the left or right indicators. Inside the assembly are electrical contacts that communicate your selection to the lighting system. Repeated use, internal wear, or damage can eventually prevent these contacts from working consistently.
A faulty stalk may cause one direction to stop responding while the other continues working normally. The indicators might also operate only when you hold the lever in a particular position. If the hazard lights function correctly but neither direction responds to the stalk, a switch or control circuit problem becomes more likely.
Similarly, a defective hazard warning switch can prevent the hazard lights from operating. However, these symptoms aren’t enough to confirm either switch has failed without further testing.
5. Faulty Flasher Unit or Electronic Control Module
The flashing pattern of your Kia Picanto’s indicators is controlled electronically. Some older versions use a separate flasher unit, while newer electrical systems may incorporate indicator control into a body control module, commonly called the BCM.
If the controlling component develops a fault, the indicators may stop flashing or behave unpredictably. For instance, a failed flasher circuit could leave the lamps inactive even when the bulbs and switches are working. A control module fault may also affect other lighting functions, depending on the design.
Nevertheless, these components shouldn’t be replaced based on symptoms alone. Power supply problems, damaged wiring, and defective switches can produce similar failures. A technician may need to examine the control module’s inputs and outputs using suitable diagnostic equipment before deciding whether it needs repair or replacement.
Kia Picanto Indicators Not Working: DIY Fixes
Once you’ve identified the symptoms, you can begin with a few simple checks to narrow down the problem. Start with the easiest and safest options before attempting any work that involves removing components.
1. Test Both Indicators and the Hazard Lights
Before replacing anything, establish which parts of the system are actually failing. Park your Picanto somewhere safe, apply the parking brake, and switch the ignition on without starting the engine. Move the indicator stalk to the left, then to the right, and observe the dashboard arrows. Next, inspect the outside lamps from a safe position while the vehicle remains parked.
Check the front, rear, and side indicators where fitted. Afterward, return the stalk to its center position and activate the hazard warning lights. Compare what happens with the following clues.
- Only one lamp stays dark. A failed bulb, socket, or local wiring connection is possible.
- One side flashes rapidly. Check for a failed bulb or poor connection on that side.
- Both directions fail, but the hazards work. Investigate the indicator stalk, its power supply, and control circuit.
- Neither the indicators nor hazards work. A shared electrical supply, fuse, or control fault may be involved.
- The lamps flash occasionally. A loose connection or intermittent switch fault could explain the behavior.
These observations won’t identify every electrical fault, but they can help prevent unnecessary part replacements. Also, ensure the hazard lights are switched off before testing the normal indicators, since the two functions generally cannot operate independently at the same time.
2. Replace Any Burned Out Indicator Bulbs
If you’ve confirmed that one conventional indicator bulb has failed, replacing it may restore normal operation. First, consult your owner’s manual to identify the correct bulb and access procedure. On certain third generation Picanto models, the conventional front and rear indicators use 21 watt PY21WLL bulbs, but other versions may differ.
Turn off the engine and lights, apply the parking brake, and allow the lamp assembly to cool. Follow Kia’s instructions for safely disconnecting the negative battery terminal before bulb replacement. If you’re unfamiliar with this procedure, have a technician handle the replacement.
For a Picanto equipped with the accessible Type A front headlamp assembly, Kia specifies the following general procedure.
- Open the hood and locate the indicator bulb socket at the headlamp assembly.
- Rotate the socket counterclockwise to release it.
- Gently press the bulb inward and turn it counterclockwise to remove it.
- Fit the correct replacement bulb and ensure it locks securely into the socket.
- Reinstall the socket by aligning its tabs and turning it clockwise.
For the rear indicators on certain models, you’ll need to open the tailgate and remove the retaining screws securing the rear lamp assembly. After removing the assembly and disconnecting its electrical connector, you can access the bulb socket. Follow the manual’s instructions carefully to avoid damaging the lamp or surrounding bodywork.
Once everything is reassembled and the battery is safely reconnected, test the indicators again. The replaced lamp should illuminate properly, and any abnormal flashing caused by that bulb should disappear.
If your Picanto has an integrated LED indicator, don’t attempt to replace an individual LED as though it were a conventional bulb. Kia recommends professional inspection for a failed LED front indicator.
3. Inspect and Replace a Blown Fuse
If several indicators have stopped working, checking the relevant fuse is a sensible next step. On many Picanto models, the interior fuse panel is near the driver’s side of the dashboard, while another fuse box is located in the engine compartment.
Use your owner’s manual and the fuse panel label to identify the correct circuit. Look for labels associated with the hazard lights, turn signals, or lighting control system. Fuse names and ratings vary between model years, so don’t rely on a diagram intended for a different Picanto.
Once you’ve located the correct fuse, follow these steps.
- Switch off the ignition and all electrical accessories.
- Follow Kia’s specified battery disconnection precautions before replacing a blown fuse.
- Open the appropriate fuse panel and locate the suspected fuse.
- Use the provided fuse puller to remove the fuse carefully.
- Examine the internal metal strip for a visible break or melting.
- If the fuse is blown, install a replacement with exactly the same amperage rating.
- Reassemble everything, reconnect the battery safely, and test the indicators.
Kia’s fuse maintenance instructions emphasize using the same fuse rating and seeking professional assistance if the replacement blows again.
A replacement fuse may restore the indicators if the original failure was temporary. However, if it blows immediately, stop testing the circuit. Never install a higher rated fuse or bypass its protection, since doing so could cause serious wiring damage or fire.
4. Check Bulb Holders and Visible Electrical Connections
If replacing a bulb doesn’t solve the problem, inspect its holder and accessible connections. Switch off the ignition, follow the manual’s precautions for electrical work, and examine the affected lamp assembly using a flashlight.
Look for loose bulb contacts, signs of corrosion, melted plastic, moisture inside the lamp housing, or a connector that isn’t fully seated. If a removable bulb simply wasn’t fitted correctly, reinstalling it securely may restore the connection. Likewise, a loose external connector can sometimes be corrected by carefully reseating it according to the manufacturer’s instructions.
However, avoid scraping electrical terminals, cutting wires, or applying random cleaning products inside damaged connectors. If you discover burned contacts, broken wiring, or significant corrosion, the affected components may need professional repair or replacement.
Also, light misting inside a lens after rain or washing isn’t necessarily a fault. Persistent water accumulation or moisture reaching electrical components is a stronger reason to have the assembly inspected.
5. Check the Indicator Stalk and Recently Changed Lighting Components
When the bulbs, accessible connections, and fuses appear normal, return to the indicator stalk. With your Picanto parked and the ignition on, move the lever gently into its full left and right positions. Observe whether the exterior lights respond consistently.
On models equipped with a one touch lane change function, a slight movement of the stalk produces a limited number of flashes. This is different from moving the stalk fully into its normal turning position. Make sure you’re using the correct position before assuming the switch has failed.
If the lever feels unusually loose, sticks, or works only when held at an angle, its internal contacts may be worn. Don’t attempt to dismantle the steering column yourself. The surrounding components include parts associated with the steering and airbag systems, which require appropriate repair procedures.
You should also consider whether the problem appeared immediately after fitting aftermarket bulbs or LED upgrades. Incompatible lighting components can cause abnormal flashing or electrical faults. If you’ve recently made such a change, check that the fitted parts meet the specifications for your exact Picanto model.
Kia specifically cautions that additional or unsuitable LED lighting can interfere with lamp operation. If an aftermarket installation has altered the original wiring, have it inspected rather than attempting further electrical modifications.
6. Contact a Qualified Automotive Technician
If your Kia Picanto’s indicators still aren’t working after the basic checks, the next step is professional diagnosis. This is especially important if both sides have failed, a replacement fuse keeps blowing, or the lights behave unpredictably despite having functional bulbs.
An experienced automotive electrician or qualified Kia technician can test the indicator stalk, wiring, ground connections, hazard switch, and relevant control components. Depending on your vehicle’s electrical design, the technician may also use diagnostic equipment to check for faults stored in the body control module.
A professional inspection is particularly useful when the problem involves inaccessible wiring or an electronic control module. It can help distinguish a faulty component from a power supply or communication problem before expensive parts are replaced.
If the indicators fail completely or become unreliable during a journey, stop somewhere safe and arrange assistance rather than continuing to drive without dependable signaling. That way, you can address the problem without exposing yourself or other road users to unnecessary danger.
Wrap-Up
When your Kia Picanto’s indicators stop working, the symptoms can help you decide where to begin. A single failed light often points to a local bulb or connection problem, while a complete failure may require a closer look at the electrical supply and control system.
Start by checking how the indicators and hazard lights behave, then investigate only the components you can safely access. If the problem persists or involves damaged wiring, professional diagnosis is the safer choice. Restoring reliable indicators will help keep your Picanto safe and ready for everyday driving.