
A Kia Niro that won’t charge can leave you unsure whether the problem is a setting, the charging station, or the vehicle itself. Sometimes the cable connects normally, yet the battery percentage stays unchanged. Other times, charging starts and then stops unexpectedly.
The most useful clues are the dashboard message, the charger’s status, and whether another charger works. Understanding those details helps you choose a safe next step and avoid replacing parts before the fault has been properly identified.
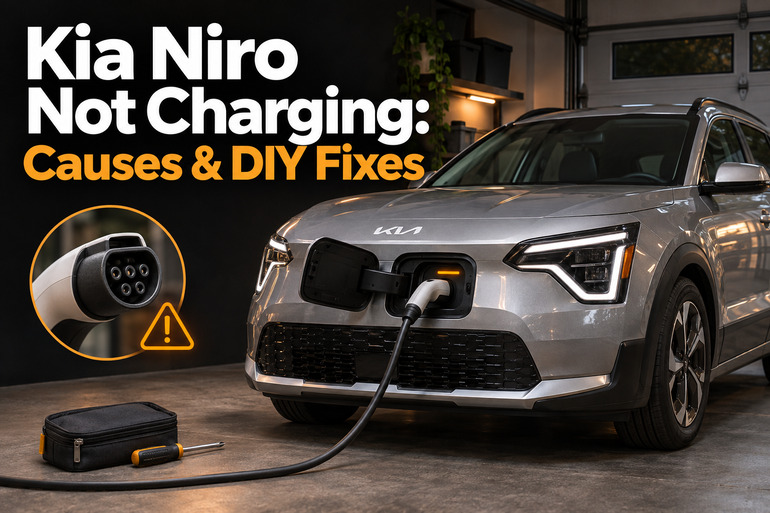
What It Means When Your Kia Niro Won’t Charge
First, identify which Niro you own. The regular Niro Hybrid doesn’t charge from an external plug. Its battery receives energy through the hybrid system, including regenerative braking. The Niro Plug In Hybrid, also called the PHEV, accepts external AC charging. The Niro EV runs entirely on electricity and supports compatible AC and DC charging. These differences determine which checks apply.
A connected cable doesn’t always mean energy is entering the battery. The vehicle might be waiting for a scheduled charging period, or a Niro EV might already have reached its selected charge limit. Check the actual charging status rather than relying only on the cable connection symbol.
Also, separate slow charging from charging failure. Temperature, charging equipment, and vehicle settings can affect how quickly the battery gains charge. Note whether the displayed battery percentage rises over time and whether the vehicle reports an active charging session. A low charging rate needs a different investigation from a session that never begins.
Some warnings require immediate action. If your Niro EV displays “Check electric vehicle system” or “Stop vehicle and check power supply,” follow the manual’s instructions to stop safely and arrange assistance. Don’t keep driving between chargers to test it. Likewise, stop using equipment with exposed wires, melting, or a burning smell.
Kia Niro Not Charging: Common Causes
Several different problems can prevent your Niro from accepting power. The following causes are useful starting points, but the symptoms alone don’t confirm which one applies.
1. Charging Schedules or Limits
Scheduled charging can make a working vehicle appear faulty. If your Niro is set to charge during selected hours, plugging it in outside that period may leave it waiting rather than charging immediately. A separate schedule in your home charger can create another restriction.
On a Niro EV, check the target battery percentage too. For example, a vehicle already above an 80% target won’t begin adding charge under that setting. AC and DC targets can be separate, so a setting that permits charging at one type of station may prevent it at another. Available menus vary with the model year and software version.
2. A Charger or Power Supply Problem
A charging failure can begin outside the vehicle. Kia’s troubleshooting guidance specifically calls for checking the charging equipment’s operating status before assuming the car needs repair. A fault indication on a portable charger or public station is therefore an important clue.
At a public station, distinguish a session that hasn’t been authorized from one that starts and then fails. Follow the station’s displayed payment and connection instructions, and record any error message. Simply attaching the cable may not complete the operator’s start procedure.
At home, a portable charger’s indicators can help identify power, charging, or fault conditions. However, indicator colors and meanings vary. Use the instructions for your exact charging unit rather than applying a light chart from another model. Kia also warns against charging from an old, damaged, or unsuitable outlet.
3. An Incomplete Connection or Connector Problem
A charging connector must seat properly before charging can proceed. If it isn’t fully inserted, the vehicle may fail to recognize a usable connection. Kia’s AC charging instructions recommend reconnecting the cable when the connector isn’t properly attached.
Visible contamination, moisture, or damage also deserves attention. A connector that feels loose, won’t engage normally, or requires force should not be treated as a simple inconvenience. Avoid repeated attempts until you’ve checked the equipment safely. Don’t touch electrical contacts or push tools into the inlet.
4. A Charging Current or Temperature Related Interruption
If charging begins normally but stops partway through, the selected AC charging current is worth checking on models that offer this adjustment. Kia’s Niro EV instructions allow another suitable current setting to be selected when charging fails to start or stops unexpectedly.
Temperature can also affect charging performance. A cold battery may take longer to charge, and equipped Niro EV models have battery warming or conditioning functions. However, slower winter charging doesn’t by itself prove that the battery or charger has failed.
Keep the distinction clear. A slower session in cold weather and a repeated charging error under ordinary conditions are different symptoms. Also, lowering current must never become a way to keep using a damaged plug, overheating outlet, or faulty installation.
5. A Fault Inside the Vehicle
When your Niro won’t charge from more than one working, compatible charger, vehicle diagnosis becomes necessary. The fault could involve the charging controls or related electrical equipment. A dashboard warning can help direct testing, but it doesn’t identify a failed part on its own.
There is a documented example affecting some 2023 Niro EV vehicles. Kia bulletin ELE298 describes poor or absent Level 1 and Level 2 charging while DC charging remains possible. It covers certain vehicles built from January 4, 2022, through March 29, 2023, and provides diagnostic steps involving the Integrated Charging Control Unit, or ICCU.
That bulletin doesn’t mean every Niro with an AC charging problem needs an ICCU. It concerns a specific group of vehicles and requires diagnostic checks. Treat a difference between AC and DC charging as useful information for the technician, rather than proof of a particular failure.
Kia Niro Not Charging: DIY Fixes
Start with settings and visible checks before attempting another charging session. If you find damage or receive a serious vehicle warning, stop troubleshooting and arrange qualified assistance.
1. Check the Charging Settings
Open the charging settings in your vehicle’s display. Look for scheduled charging, departure settings, or restrictions on charging hours. Menu names differ, so use the owner’s manual for your model year if the options aren’t obvious.
Temporarily disable the charging schedule for a controlled test. Check your home charger’s app for its own schedule as well. Some Niro models provide a button that temporarily overrides scheduled charging, but its location and operation aren’t universal.
For a Niro EV, confirm that the target percentage permits further charging. Then reconnect using the normal procedure and check the vehicle’s status. If charging begins, restore your preferred settings carefully and make sure the car and charger schedules allow a suitable charging period.
2. Reconnect the Cable Correctly
Park safely, select Park, apply the parking brake, and turn the vehicle off before connecting. End any active session before disconnecting the cable, following the charger’s instructions and the vehicle’s normal unlocking procedure.
With the connector disconnected, look for obvious damage or contamination without touching the contacts. Don’t insert cleaning tools, apply contact chemicals, or attempt repairs inside the inlet. If the connector or inlet is wet, damaged, or visibly contaminated, address that condition according to the manual before trying again.
When everything is suitable for use, hold the connector by its handle and insert it fully without forcing it. Check for the expected charging indication afterward. If it won’t seat or release normally, stop pulling or pushing and seek help.
3. Read the Charger’s Status and Instructions
Check the portable charger’s control box or the public station’s screen. Record the exact fault code or message, along with whether it appears before charging starts or after power has been delivered. Use the equipment’s own manual to interpret indicator lights. A power light alone doesn’t establish that the vehicle is charging.
For home charging, plug portable equipment directly into a suitable outlet as instructed. Don’t add an extension cord or power strip. If an outlet is loose, discolored, cracked, or associated with repeated electrical trips, stop using it and contact an electrician. Don’t open the outlet, charging unit, or electrical panel to investigate.
4. Test Another Compatible Charger
If there are no serious warnings and the vehicle has enough charge to reach another location safely, try a different working charger. Kia recommends this comparison because it helps separate an equipment problem from a vehicle problem.
Keep the comparison useful. If your home AC charger fails, another compatible AC charger is a clearer test than immediately switching to DC. For a Niro PHEV, use the AC charging equipment specified for that vehicle. Don’t assume the charging options available to a Niro EV apply to the PHEV.
Record where charging succeeds and fails. If the vehicle works elsewhere, give that information to the home charger manufacturer or installer. If it fails at another working charger, arrange vehicle inspection. Success at one station narrows the investigation, but intermittent faults may still need further testing.
5. Try a Lower AC Current Setting Where Available
Some Niro EV models let you reduce AC charging current through the vehicle’s EV settings. Kia specifically suggests selecting another suitable current when charging doesn’t begin or stops during a session. This adjustment isn’t available in the same form on every Niro.
Only try it when the connector, cable, and supply appear safe and there are no serious warnings. Stop the session, select the lower setting according to your manual, and restart normally. Expect charging to take longer.
If the lower setting works, record the result for your technician or charger installer. It shows that charging behavior changes with the setting, but it doesn’t establish why. Repeated interruptions still deserve investigation, particularly if they occur across several chargers.
6. Contact a Qualified Kia Technician
Arrange professional diagnosis if the safe checks fail, the fault returns, or the connector won’t operate normally. Serious electrical system warnings require earlier assistance. If the manual directs you to stop driving, arrange recovery instead of attempting another charger visit.
Bring the technician your model year, powertrain type, battery percentage, warning messages, and charging history. Include whether Level 1, Level 2, or DC charging works, where applicable. Photos of the dashboard and charger errors can make an intermittent fault easier to describe.
Ask the dealer to check applicable service information for your vehicle identification number. Leave high voltage testing, charging module repairs, and internal inlet work to trained personnel. Don’t remove orange cables, open charging electronics, or disconnect batteries as a general reset attempt.
Wrapping Up
A Kia Niro charging problem becomes easier to assess when you establish exactly what happens after plugging in. A waiting session, a charger fault, and a vehicle warning each point to a different next step. Clear observations help you avoid unnecessary purchases and give a repair shop useful information.
Begin with the checks that fit your model and stop whenever equipment damage or a serious warning appears. If charging still fails, keep a short record of your results and arrange diagnosis before the remaining battery charge limits your options.