Nothing ruins a summer drive faster than a broken air conditioning system. You turn the dial, crank it to max, and instead of that blessed cool breeze, you get a weak puff of warm air or nothing at all.
Your Toyota Camry’s AC is supposed to be reliable, but even the best systems fail sometimes. Whether it’s blowing hot air, making weird noises, or simply refusing to turn on, a malfunctioning AC can turn your daily commute into a sweaty ordeal.
This guide walks you through the most common reasons your Camry’s AC might quit on you and shows you practical ways to get it working again without immediately running to a mechanic.
What’s Really Happening When Your AC Fails
Your Camry’s air conditioning system is more complex than most people realize. It’s not just a fan blowing cold air. The system relies on a refrigerant that cycles through several components, changing from liquid to gas and back again. This process absorbs heat from inside your car and releases it outside, leaving you with cool, comfortable air.
When something goes wrong, the entire cycle gets disrupted. Sometimes the problem is as simple as a blown fuse. Other times, it involves a leak that’s slowly draining your refrigerant. The compressor, which acts as the heart of the system, might seize up. Or the blend door actuator, a small motorized component that controls air temperature, could stop working.
Your AC system includes the compressor, condenser, evaporator, expansion valve, and various hoses and sensors. Each part plays a specific role, and if even one fails, your cooling suffers. The refrigerant needs to stay at proper levels and pressure to work effectively. Without enough refrigerant or with a faulty compressor, the system can’t generate cold air no matter how high you turn the dial.
What makes this frustrating is that many AC problems start small and gradually worsen. You might notice the air isn’t as cold as it used to be, or it takes longer to cool down your car. These early warning signs often get ignored until the system fails completely. Catching issues early saves you money and prevents more serious damage to expensive components.
Toyota Camry AC Not Working: Common Causes
Several things can cause your Camry’s AC to stop working properly. Each problem has its own symptoms and requires a different approach to fix. Here’s what typically goes wrong.
1. Low or Leaking Refrigerant
Refrigerant is the lifeblood of your AC system. Without enough of it, your compressor can’t do its job. Most AC systems don’t just run out of refrigerant on their own. If levels are low, you probably have a leak somewhere.
Leaks can develop in hoses, connections, or even in the condenser itself. Road debris sometimes punctures the condenser, which sits right behind your front grille. O-rings and seals dry out over time, especially on older Camrys. Even a tiny leak will eventually drain your system.
You might notice the air starts out cold but gradually warms up as you drive. That’s a classic sign of low refrigerant. The system works initially but can’t maintain cooling as the refrigerant level drops. Some people think they can just add refrigerant and call it a day, but if you have a leak, you’ll be right back where you started in a few weeks.
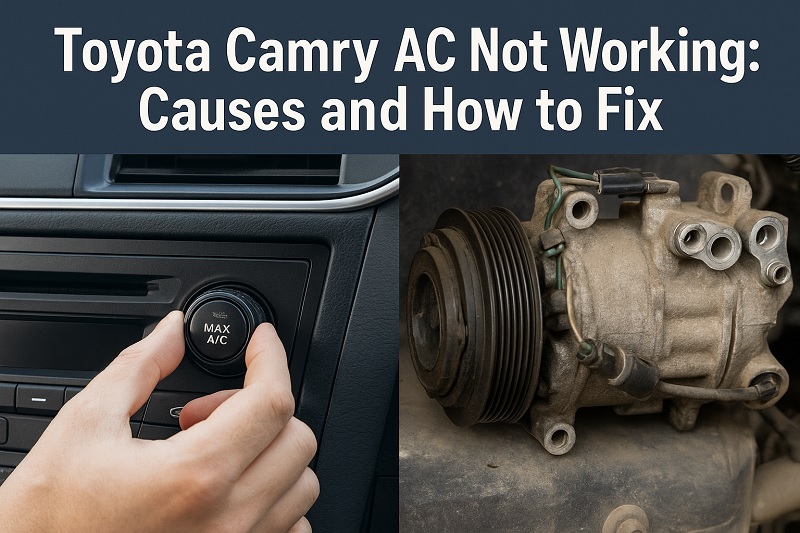
2. Faulty Compressor
The compressor pressurizes refrigerant and keeps it moving through the system. Without a working compressor, your AC is basically dead. These components last a long time, but they do wear out, especially if the AC hasn’t been used regularly.
Compressors can fail suddenly or gradually decline. You might hear grinding, squealing, or clicking noises when you turn on the AC. That’s often the compressor struggling. Sometimes the clutch that engages the compressor wears out, so the compressor never actually turns on even though everything else seems fine.
Running your AC occasionally during winter helps keep the compressor lubricated. If you never use it for months, seals can dry out and internal parts can stick. Once a compressor fails completely, it usually needs replacement, which isn’t cheap.
3. Electrical Issues
Modern Camrys have complex electrical systems, and your AC relies on several circuits, fuses, and relays to function. A single blown fuse can shut down the entire system. The AC clutch relay might fail, preventing the compressor from engaging.
Sometimes the problem isn’t a failed component but rather a loose connection or corroded wire. Moisture gets into electrical connectors and causes corrosion, especially in humid climates. The AC pressure switch, which monitors refrigerant pressure, might malfunction and tell the system to shut down even when everything is fine.
Electrical problems can be tricky because the symptoms overlap with mechanical failures. Your AC might work intermittently, shutting off and turning back on randomly. Or it might refuse to start at all, making you think the compressor is dead when really it’s just not getting power.
4. Clogged Cabin Air Filter
Your Camry has a cabin air filter that cleans the air before it enters the interior. This filter catches dust, pollen, leaves, and other debris. Over time, it gets packed with junk and restricts airflow.
A clogged filter doesn’t stop the AC from working, but it makes it seem like it’s not working. The system produces cold air, but very little of it reaches you. You’ll notice weak airflow from the vents even at maximum fan speed. The air might be cold, but there’s just not enough of it to cool the cabin effectively.
Most people forget about this filter because it’s out of sight. Toyota recommends changing it every 15,000 to 30,000 miles, but if you drive in dusty conditions or areas with lots of pollen, you’ll need to replace it more often. It’s one of the easiest maintenance items to overlook, yet it has a huge impact on AC performance.
5. Failed Blend Door Actuator
The blend door actuator is a small electric motor that controls a flap inside your dashboard. This flap directs air through either the heater core or the evaporator, giving you hot or cold air depending on your temperature setting.
When the actuator fails, the blend door gets stuck in one position. You might only get hot air no matter what temperature you select. Or you might get cold air on one side and hot air on the other if your Camry has dual-zone climate control. Sometimes you’ll hear a clicking or tapping noise from behind the dashboard as the actuator tries and fails to move the door.
These actuators are made of plastic gears that wear out over time. The motor keeps trying to move the door, but stripped gears just spin uselessly. It’s a common problem on Camrys, especially as they age. The AC system itself works perfectly, but you can’t access the cold air because the blend door is stuck in the wrong position.
Toyota Camry AC Not Working: DIY Fixes
Most AC problems can be diagnosed and many can be fixed at home with basic tools. Here’s how to tackle the most common issues yourself.
1. Check and Replace Fuses
Start with the simplest solution. Pop your hood and locate the fuse box. Your owner’s manual shows which fuses control the AC system. Pull each relevant fuse and inspect it.
A blown fuse has a broken wire inside or appears burned. Replace any blown fuses with ones of the exact same amperage. Don’t use a higher-rated fuse thinking it will prevent future problems. That’s dangerous and can cause electrical fires.
If the new fuse blows immediately, you have a short circuit somewhere. That requires professional diagnosis. But if the fuse was just old and worn out, replacing it might solve your problem instantly. This five-minute check can save you hundreds of dollars.
2. Replace the Cabin Air Filter
Open your glove box and empty it completely. Look for tabs or clips on the sides that let the glove box drop down. Once it’s lowered, you’ll see the cabin air filter cover. Remove the cover and slide out the old filter.
Compare the old filter to a new one, and you’ll be shocked at how dirty it is. Slide the new filter in, making sure the airflow arrow points in the correct direction. Reinstall the cover and close the glove box.
This takes about ten minutes and costs around twenty dollars. You’ll immediately notice stronger airflow from your vents. If weak airflow was your only problem, you just fixed your AC for less than the cost of lunch.
3. Inspect for Visible Leaks
Turn on your AC and let it run for a few minutes. Then pop the hood and look at the AC lines and components. Check for oily residue around connections, hoses, and the condenser.
Refrigerant is mixed with oil, so leaks leave greasy marks. Look carefully at the condenser, which sits in front of your radiator. Check all hose connections and the service ports. If you find obvious damage or wet spots, you’ve located your leak.
Small leaks can sometimes be temporarily sealed with AC leak sealant products, but these are band-aid fixes. Larger leaks need proper repair. At least knowing where the leak is gives you valuable information if you decide to visit a shop. You won’t be going in blind, and you can get a more accurate estimate.
4. Test the AC Compressor Clutch
Start your car and turn on the AC. Have someone watch the compressor pulley while you toggle the AC on and off. The clutch should engage with a noticeable click, and the center part of the pulley should start spinning.
If the outer pulley spins but the center doesn’t engage, your clutch is faulty. If nothing happens at all, you might have an electrical issue or a failed compressor. Listen for unusual noises like grinding or squealing when the clutch engages.
You can sometimes remove the relay that controls the compressor clutch and test it with a multimeter. If the relay is bad, replacing it costs about ten dollars and takes two minutes. If the compressor itself is bad, you’re looking at a much bigger job, but at least you know what you’re dealing with.
5. Recharge the Refrigerant
You can buy refrigerant recharge kits at any auto parts store. These kits include refrigerant and a pressure gauge. Find the low-pressure service port under your hood. It’s usually on the larger AC line and has a cap marked with an “L.”
Connect the recharge kit following the instructions exactly. Start your car and turn the AC to maximum. The compressor should be running. Slowly add refrigerant while watching the pressure gauge. Stop when you reach the proper pressure range marked on the gauge.
This only works if you have a slow leak or if your refrigerant is slightly low. If you have a major leak, the refrigerant will just escape again. Some recharge kits include UV dye that helps you find leaks later with a special light. Adding refrigerant is a temporary fix for most problems, but it can buy you time until you can afford a proper repair.
6. Contact an AC Specialist
If you’ve tried these fixes and your AC still doesn’t work, it’s time to call a professional. Some problems require specialized equipment to diagnose. Evacuating and properly recharging an AC system needs a recovery machine that costs thousands of dollars. Replacing a compressor or evaporator involves major disassembly.
An experienced AC technician has the tools to measure exact refrigerant levels, check system pressures, and test electrical components. They can find leaks you’d never spot on your own and make repairs that last. Sometimes paying for professional help is cheaper than buying the wrong parts and guessing at repairs.
Wrapping Up
Your Camry’s AC system keeps you comfortable through hot weather, but it needs occasional maintenance and attention. Most problems start small, so pay attention to early warning signs like weak airflow or gradually warming air.
Many fixes are simple enough to handle yourself, saving significant money. Start with the easy stuff like checking fuses and replacing the cabin filter before assuming you need expensive repairs. Even if you can’t fix the problem yourself, understanding what’s wrong helps you make informed decisions when talking to mechanics.