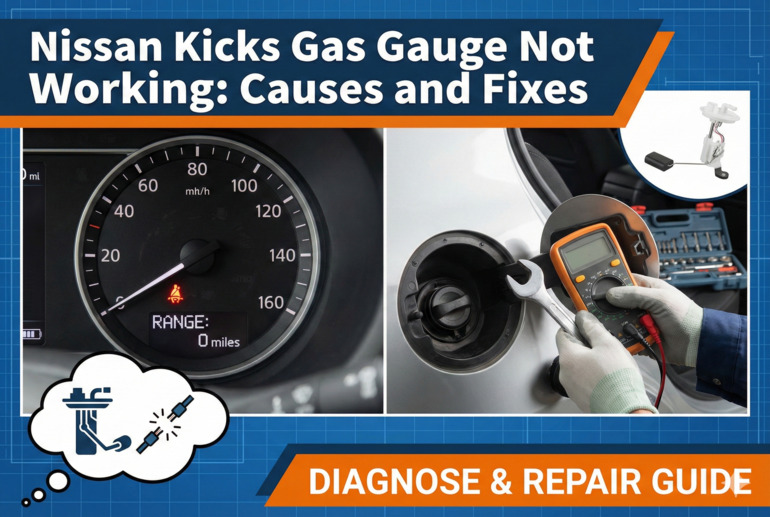
You’re cruising down the highway in your Nissan Kicks, and suddenly you notice something odd. The gas gauge needle is stuck on full even though you know you’ve driven 200 miles since your last fill-up. Or maybe it’s sitting stubbornly on empty despite the fact that you just pumped 15 gallons into the tank.
Either way, a faulty gas gauge puts you in a tough spot. You can’t tell how much fuel you actually have, which means you’re either constantly stopping at gas stations out of fear or taking risky gambles with how far you can push it. From this article, you’ll learn exactly what causes this frustrating problem and how to fix it yourself without spending hundreds at the dealership.
What’s Really Happening When Your Gas Gauge Fails
Your Nissan Kicks gas gauge seems simple enough. A needle points to F when you’re full and E when you’re running on fumes. But behind that basic display sits a surprisingly complex system that can break down in several ways.
The system relies on a fuel sending unit inside your gas tank. This unit contains a float attached to a variable resistor, similar to how a toilet float works. As fuel levels drop, the float moves down, changing the electrical resistance sent to your gauge. Your dashboard then translates that resistance into the position of the needle you see.
When this communication breaks down, your gauge might freeze in one position, bounce erratically between full and empty, or display readings that make no sense. Some drivers report their gauge working fine when the tank is above half but going haywire below that point. Others see the needle drop to empty the moment they start the car, only to climb back up after a few minutes of driving.
The problem extends beyond mere inconvenience. Running out of gas because you trusted a faulty gauge can leave you stranded on the side of the road. Even worse, repeatedly running your tank too low damages the fuel pump, which uses gasoline to stay cool. That means one problem can quickly create another, more expensive one.
Nissan Kicks Gas Gauge Not Working: Common Causes
Several culprits could be behind your malfunctioning gas gauge, and pinpointing the exact one takes a bit of detective work. Let’s look at what typically goes wrong with these systems and why.
1. Faulty Fuel Sending Unit
The fuel sending unit takes more abuse than almost any other part in your fuel system. It sits submerged in gasoline for years, constantly moving up and down as you drive over bumps and fill your tank. That float arm can bend, the resistor can corrode, and the connections can loosen.
This component fails more often in vehicles that frequently run on low fuel. When the tank gets near empty, the sending unit’s float can scrape against the bottom of the tank, wearing down its mechanism. Sediment and debris in old gasoline also accumulate at the bottom, potentially jamming the float’s movement.
You might notice this problem starts gradually. The gauge reads accurately at full but becomes less reliable as fuel drops. Eventually, it stops responding altogether or gets stuck at one reading regardless of how much gas you actually have.
2. Corroded or Loose Wiring Connections
Your fuel sending unit connects to the gauge through electrical wiring that runs from inside the gas tank to your dashboard. These wires pass through harsh environments, including underneath your vehicle where they face moisture, road salt, and temperature extremes.
Corrosion builds up on connection points, creating resistance that interferes with the signal. Sometimes the connections just work themselves loose from vibration over time. A single corroded connector can make your gauge display wildly inaccurate readings or stop working completely.
3. Defective Instrument Cluster
The gauge itself lives inside your instrument cluster, and that cluster contains delicate electronics. These components can fail due to age, heat exposure, or electrical surges. If you’ve noticed other gauges acting strangely, like your speedometer or temperature gauge, the cluster itself might be the problem.
This issue often announces itself differently than a sending unit failure. The needle might stick in one spot without any movement, or it could twitch and jump erratically even when the car is parked. Some drivers report their gauge working intermittently, functioning perfectly on some trips and failing completely on others.
Dashboard electronics particularly hate extreme temperatures. If you live somewhere with scorching summers or freezing winters, and your Kicks sits outside, the constant expansion and contraction can crack solder joints on the circuit board. These tiny breaks disrupt the electrical pathways needed for accurate gauge readings.
4. Blown Fuse or Faulty Ground Connection
Your fuel gauge system runs through your vehicle’s electrical network, protected by fuses and reliant on proper ground connections. A blown fuse cuts power completely, while a bad ground creates erratic behavior that’s hard to diagnose.
Ground connections corrode easily, especially in humid climates or areas where roads get salted in winter. The gauge might work when you first start the car but fail after the engine warms up and components expand slightly. Or it could work perfectly on dry days but act up when it rains.
5. Software Glitch in the Body Control Module
Modern vehicles like the Nissan Kicks use a body control module (BCM) that processes data from sensors throughout the car, including the fuel sending unit. Software glitches in this module can cause gauge problems that have nothing to do with physical components.
These glitches create the strangest symptoms. Your gauge might reset every time you restart the car, always showing full for the first few minutes before settling into an accurate reading. Some drivers experience gauges that work fine until they hit a bump, then suddenly jump to a different level.
Nissan Kicks Gas Gauge Not Working: DIY Fixes
Tackling a faulty gas gauge yourself saves serious money compared to dealership rates, and many fixes require only basic tools and patience. Here’s how to track down and solve the problem step by step.
1. Check and Replace the Fuel Gauge Fuse
Start with the easiest possible fix. Your owner’s manual shows the fuse box location and identifies which fuse protects the fuel gauge circuit. Pull that fuse and inspect it carefully.
A blown fuse has a broken metal strip inside the clear plastic housing. You can see it if you look closely. Replace it with a new fuse of the exact same amperage rating. Never use a higher-rated fuse as a substitute.
After replacement, test your gauge. If the new fuse blows immediately or the gauge still doesn’t work, you’ve ruled out one simple cause and can move on to other possibilities. This five-minute check could save you hours of more complicated troubleshooting.
2. Inspect and Clean Ground Connections
Poor grounds cause more electrical gremlins than most people realize. Find the ground point for your fuel gauge system, usually located near the fuel tank or under the dashboard. The connection should be tight and free of corrosion.
Remove the ground wire and clean both the wire terminal and the metal surface it connects to. Use a wire brush or sandpaper to scrub away any rust, paint, or oxidation. You want shiny bare metal for the best connection. Spray some electrical contact cleaner on both surfaces, then reattach the wire and tighten it firmly.
This simple maintenance fixes intermittent gauge problems surprisingly often. Clean grounds ensure proper electrical flow, which translates to accurate gauge readings and reliable performance.
3. Test the Fuel Sending Unit
Testing the sending unit requires accessing the top of your fuel tank. In the Nissan Kicks, you’ll need to remove the rear seat cushion to reach the access panel. Once exposed, disconnect the electrical connector from the sending unit.
Use a multimeter set to measure resistance (ohms). Touch the probes to the sending unit terminals and watch the reading as you move the float arm manually. The resistance should change smoothly as the float moves from empty to full. Typical readings range from about 10 ohms at full to 180 ohms at empty, though your specific model might differ.
If the resistance doesn’t change, jumps erratically, or shows infinite resistance, your sending unit needs replacement. If the readings look good, the problem lies elsewhere in the system. This test gives you concrete data about whether the sensor itself functions properly.
4. Check Wiring Between Tank and Dashboard
Wiring problems hide between components, making them trickier to find. Start at the fuel tank connector and trace the wires toward the front of the vehicle, looking for obvious damage like cuts, burns, or heavily corroded sections.
Pay special attention to areas where wires pass through the body or near the exhaust system. Heat and vibration concentrate in these spots. Wiggle connectors while watching the gauge to see if movement affects the reading. A gauge that responds to wire wiggling tells you exactly where the break or corrosion lives.
Repair damaged wiring by cutting out bad sections and splicing in new wire using solder and heat shrink tubing. Clean any corroded connectors with electrical contact cleaner and make sure they click together firmly.
5. Reset the Body Control Module
Sometimes your Kicks just needs a computer reset to clear software glitches. Disconnect your battery’s negative terminal and leave it disconnected for 15 minutes. This clears temporary memory in the BCM and other control modules.
Reconnect the battery and start your vehicle. Let it idle for a few minutes while the systems reinitialize. Take a short drive to see if the gauge starts functioning normally. This zero-cost fix resolves software-related issues more often than you might expect.
6. Replace the Instrument Cluster
If you’ve tested everything else and confirmed the sending unit works properly, the gauge itself might be bad. Instrument cluster replacement requires removing the dashboard trim and disconnecting the cluster from its mounting and wiring.
You can find replacement clusters from salvage yards, online retailers, or dealerships. Make sure you get one compatible with your specific Kicks model year and trim level. Installation involves careful handling of airbag components and electrical connections, so work slowly and methodically.
After installing a new cluster, you might need to have it programmed to match your vehicle’s mileage. Many auto parts stores offer this service, or you can visit a dealership for proper configuration.
7. Consult a Professional Mechanic
If all these fixes leave you still staring at a dead gauge, something more complex is happening. A qualified mechanic has diagnostic tools that can read trouble codes and monitor live data from your fuel system. They can spot problems that aren’t obvious during basic testing and have the experience to solve unusual issues efficiently.
Professional diagnosis makes sense when you’ve exhausted the simple solutions. Spending a hundred dollars on proper diagnostics beats throwing parts at the problem hoping something works. Let an expert take over before frustration sets in or you accidentally create new problems while troubleshooting.
Wrapping Up
A broken gas gauge turns every drive into guesswork, but you don’t have to live with that uncertainty. Most causes behind this problem are straightforward enough for determined DIYers to handle, from blown fuses to faulty sending units.
Start with quick checks like fuses and grounds before moving to more involved repairs. Keep track of what you’ve tested so you don’t waste time repeating steps. Your Nissan Kicks deserves a working gauge, and with these fixes in your toolkit, you’ll get there without breaking the bank.