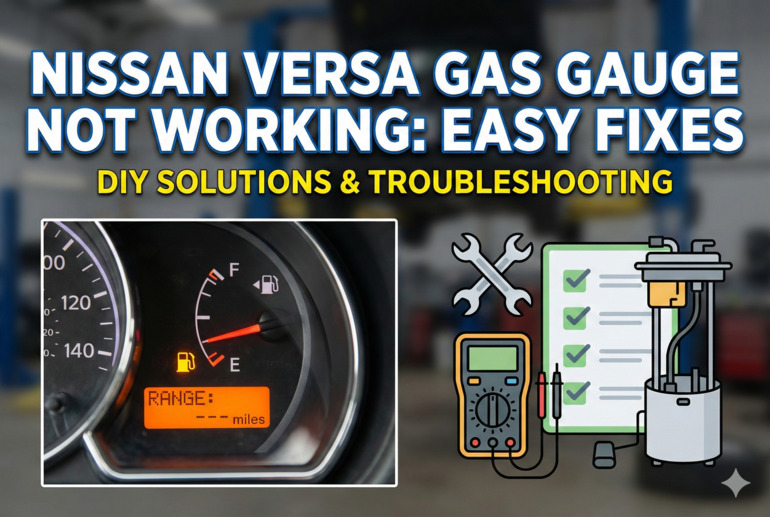
Your Nissan Versa has been running smoothly, but lately, you’ve noticed something odd. The gas gauge seems to have a mind of its own, showing full when you know the tank is nearly empty, or sitting on empty right after you’ve filled up. This leaves you second-guessing every trip and worrying about running out of fuel at the worst possible moment.
A faulty gas gauge creates real stress. You can’t plan your fuel stops properly, and there’s always that nagging fear of getting stranded. The good news is that most gas gauge problems have straightforward solutions you can tackle yourself.
In this guide, you’ll learn what causes your Versa’s gas gauge to stop working correctly and discover practical fixes you can try at home. We’ll walk through everything from simple checks to more involved repairs, helping you get that gauge reading accurately again.
What’s Really Going On With Your Gas Gauge
Your gas gauge relies on several components working together seamlessly. Inside your fuel tank sits a float attached to a sending unit, which measures how much fuel surrounds it. As your fuel level drops, the float descends, changing the electrical resistance in the sending unit. This signal travels through your car’s wiring to the instrument cluster, where it moves the needle to show you how much gas remains.
When any part of this system fails, your gauge can display wrong information or stop working entirely. The needle might stick in one position, bounce erratically, or give readings that make no sense compared to how much you’ve driven. Sometimes the problem happens gradually, with the gauge becoming less accurate over time. Other times, it fails suddenly, leaving you completely in the dark about your fuel level.
Ignoring a malfunctioning gas gauge can lead to bigger headaches than just inconvenience. Running out of fuel can damage your fuel pump, which uses gasoline for cooling and lubrication. Modern fuel pumps cost several hundred dollars to replace, making this an expensive consequence of a seemingly minor issue. Plus, getting stranded on a busy highway or in an unfamiliar area creates safety risks you don’t need.
Your Versa’s fuel system includes other warning signs beyond the gauge. Pay attention if your low fuel warning light behaves strangely, turning on when you’ve just filled up or never illuminating even when running on fumes. These symptoms often point to the same underlying problems affecting your gauge accuracy.
Nissan Versa Gas Gauge Not Working: Common Causes
Several components can fail and cause your gas gauge to malfunction. Understanding what typically goes wrong helps you target your troubleshooting efforts effectively.
1. Faulty Fuel Sending Unit
The fuel sending unit takes the biggest beating in your fuel system. It sits submerged in gasoline constantly, dealing with temperature changes, fuel additives, and the natural wear from the float arm moving up and down thousands of times. Over time, the resistance wiper inside the sending unit wears down or the contacts corrode, causing inaccurate signals.
You’ll notice this problem if your gauge reads empty when you know you have fuel, or if it sticks at certain levels. The needle might jump from half tank to empty suddenly, or refuse to move past a quarter tank no matter how much you fill up. These erratic behaviors point directly to a sending unit losing its ability to measure fuel level correctly.
Sending units fail more often in Versas that frequently run on low fuel. The constant exposure to air rather than fuel accelerates corrosion and wear on the float mechanism.
2. Damaged Wiring or Corroded Connections
Your Versa’s electrical system battles constant vibration, temperature swings, and exposure to moisture. The wiring harness connecting the fuel tank to the instrument cluster can develop breaks, especially where it bends or rubs against other components. Corrosion builds up at connection points, creating resistance that interferes with the signal from the sending unit.
This type of problem often shows up as intermittent gauge operation. Your gauge might work fine on smooth roads but act up over bumps. Temperature changes can affect it too, with the gauge working when cold but failing after the car warms up. These clues suggest your wiring has damage that opens and closes the circuit based on movement or expansion.
3. Blown Fuse or Bad Relay
Your instrument cluster runs on protected circuits with fuses and relays. A blown fuse cuts power completely, while a failing relay can cause intermittent operation. These electrical protection devices prevent damage from power surges or short circuits, but they can fail from age or repeated stress.
When a fuse blows, you’ll typically lose more than just the gas gauge. Other instruments on the same circuit might stop working too. Check if your speedometer, temperature gauge, or other dashboard displays show problems alongside the gas gauge. This pattern helps confirm an electrical supply issue rather than a mechanical fuel system problem.
4. Malfunctioning Instrument Cluster
The gauge mechanism itself can fail inside your dashboard. The small electric motor that moves the needle wears out, or the circuit board develops cracks from heat cycling. While less common than sending unit failures, cluster problems do happen, especially in older Versas with high mileage.
Instrument cluster failures usually affect multiple gauges simultaneously. You might see your gas gauge acting up while the temperature gauge or speedometer also shows odd behavior. The needles might sweep back and forth during startup, stick in strange positions, or display completely random readings that change without any logical pattern.
5. Grounding Issues
Your fuel sending unit needs a solid ground connection to send accurate signals. The ground wire attaches to the car’s metal frame, completing the electrical circuit. Rust, paint, or loose bolts at the ground point create resistance that throws off the gauge reading.
Ground problems cause symptoms similar to bad wiring. Your gauge reading might fluctuate based on road conditions or whether other electrical accessories are running. Turning on headlights or the radio might make the gauge needle move, which tells you the electrical system is sharing ground paths incorrectly. This cross-contamination happens when the primary ground connection fails and electricity finds alternate routes through your car’s chassis.
Nissan Versa Gas Gauge Not Working: How to Fix
Fixing your gas gauge often requires a systematic approach, starting with the easiest checks and working toward more complex repairs. These solutions will get you back to confident driving without fuel anxiety.
1. Check and Replace Fuses
Start by locating your fuse box, which sits under the dashboard on the driver’s side in most Versas. Your owner’s manual shows exactly which fuse controls the instrument cluster. Pull that fuse out and examine it closely under good light. A blown fuse has a broken wire visible inside the clear plastic housing.
Replace any blown fuses with the exact same amperage rating. Never use a higher-rated fuse thinking it’ll last longer. That defeats the protection system and can cause electrical fires. After replacing the fuse, turn your ignition to the on position without starting the engine. Watch if the gas gauge moves to show your fuel level. If the fuse blows again immediately, you’ve got a short circuit somewhere that needs professional diagnosis.
Keep spare fuses in your glove compartment for future issues. They’re cheap insurance against getting stranded.
2. Inspect Wiring Connections
Pop your hood and trace the wiring harness from your fuel tank toward the dashboard. Look for obvious damage like exposed wires, melted insulation, or connectors that have pulled apart. Pay special attention where wires pass through the firewall or run along the frame rails.
At the fuel tank, you’ll find a connector that plugs into the sending unit. Disconnect it and check for corrosion on the metal pins. Green or white buildup means moisture has gotten inside. Clean the pins with electrical contact cleaner and a small wire brush. Make sure the connector clicks firmly when you plug it back together. Wiggle it gently to confirm it’s seated properly.
Test your gauge after securing each connection. Sometimes the act of unplugging and reconnecting components clears up intermittent problems by scraping away minor corrosion.
3. Test the Fuel Sending Unit
This fix requires draining some fuel and removing your rear seat to access the sending unit. Your Versa’s fuel pump assembly comes out through a circular access panel under the back seat cushion. Remove the bolts holding the ring down, then carefully lift out the entire assembly.
With the sending unit out, you can test it with a multimeter. Set your meter to measure resistance and touch the probes to the sending unit terminals. Move the float arm manually from empty to full position. You should see the resistance change smoothly from about 3 ohms at empty to around 90 ohms at full. Jumpy readings or no change at all confirms a bad sending unit.
Replacement steps:
- Disconnect the battery negative terminal first
- Remove fuel tank access panel under rear seat
- Unplug electrical connector and fuel lines
- Remove retaining ring (usually needs a special tool)
- Pull out old sending unit carefully
- Install new unit with fresh O-ring seal
- Reconnect everything in reverse order
4. Clean Ground Connections
Find where your fuel tank grounds to the chassis. This ground strap usually bolts to the frame near the tank or connects to the body under the rear seat area. Remove the bolt and inspect the contact surfaces. Sand away any rust, paint, or corrosion until you see bare, shiny metal on both the ground strap terminal and the frame.
Apply a thin coat of dielectric grease before bolting the ground back down. This prevents future corrosion while maintaining good electrical contact. Tighten the bolt firmly but don’t strip the threads.
Check the instrument cluster ground too. This often connects behind the dashboard near the fuse box. The same cleaning process applies here. Fresh grounds can fix mysterious electrical gremlins throughout your car, not just the gas gauge.
5. Replace the Instrument Cluster
If all other fixes fail and you’ve confirmed the sending unit works properly, your instrument cluster itself needs replacement. This job takes patience but isn’t beyond DIY capability. You’ll need to remove the steering wheel cover and dashboard trim pieces to access the cluster mounting screws.
Before buying a replacement cluster, verify the part number matches your Versa’s year and model. Clusters aren’t always interchangeable between model years. Some junkyards sell tested used clusters for a fraction of new prices, though warranties vary.
Installation process:
- Disconnect battery and wait 15 minutes for airbag system to discharge
- Remove steering column covers and dashboard trim
- Unscrew cluster mounting bolts
- Pull cluster forward gently and unplug all connectors
- Transfer any bulbs from old to new cluster if needed
- Connect new cluster and test before final installation
- Reassemble dashboard components
6. Consult a Professional Mechanic
When you’ve tried these fixes without success, or if you’re uncomfortable working with fuel system components, a qualified mechanic needs to take over. They have specialized diagnostic equipment that can pinpoint electrical problems your multimeter might miss. Professional shops also handle fuel tank removal safely if your sending unit access is blocked or rusted in place.
Mechanics see these problems regularly and can often diagnose issues in minutes that might take you hours to track down. The cost of professional diagnosis often saves money compared to replacing parts based on guesses. Plus, shops warranty their work, giving you peace of mind that the repair will last.
Wrapping Up
A broken gas gauge in your Nissan Versa doesn’t have to stay broken. Most causes stem from simple electrical issues you can fix with basic tools and a Saturday afternoon. Start with the easy checks like fuses and connections before moving to more involved repairs. Your gauge will be back to accurate readings before you know it.
Take your time working through each solution methodically. Rushing leads to missed problems and wasted money on unnecessary parts. Trust your observations about when and how the gauge acts up, as those details point you toward the real culprit. With these fixes in your toolkit, you’ll never worry about your fuel level again.